The Moving Spiders
Little spiders on your shoulder
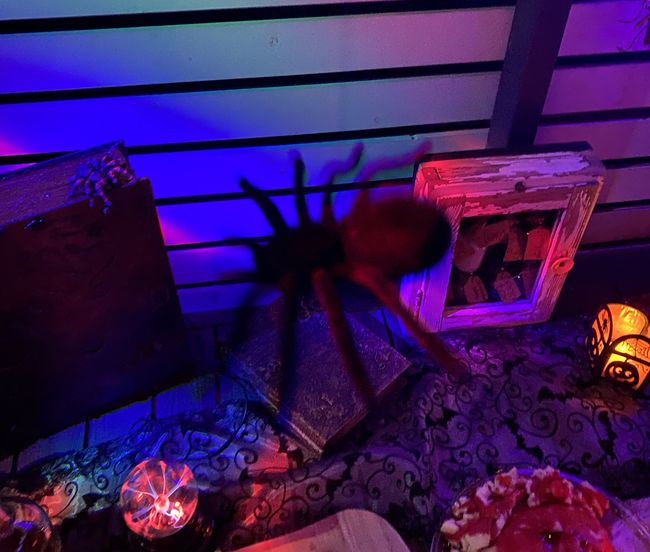
#For this year’s Halloween project I built something without pumpkins. The small moving spiders are to scare our guests. During the party, we placed it over the buffet table. A second one was placed in such a way that it reached down to the kids’ shoulders when they were standing at the buffet and didn’t suspect anything. Using small motors, the spiders moved up and down on their own.
Parts & Tools
#The following components & tools are needed to assemble the project:
- ESP8266 (Wemos D1 mini, Nodemcu) or ESP32
- L298 dual motor bridge board
- two slow motors with ~100-200rpm, I went with micro gear motors
- prototyping board
- male & female pin headers
- material for a small roller to wind up the thread
- two spiders or scary items
- USB cable and power supply
- soldering iron
Hardware assembly
#The wiring of electronic parts is straightforward. For the small motors, usually no extra power source is required. The L298 dual motor board can be directly connected to the 5V and GND of the ESP board. Additionally, 4 wires are needed to control the motors. A forward and reverse signal is needed for each motor. These must be connected to the digital pins of the ESP board.
The motors are also powered by the L298 dual motor board directly.
Here is my prototype and wiring diagram:
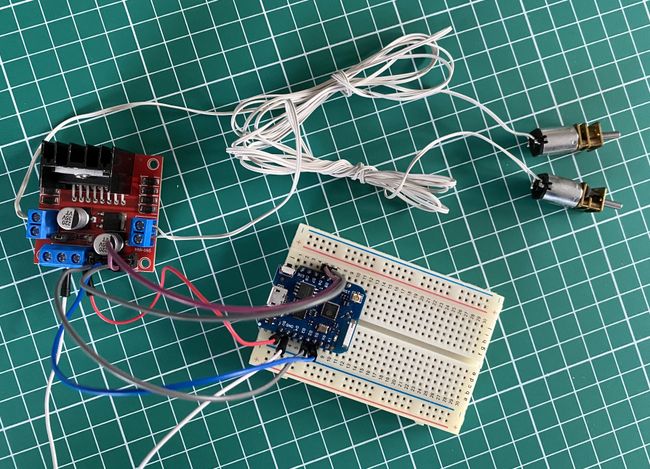
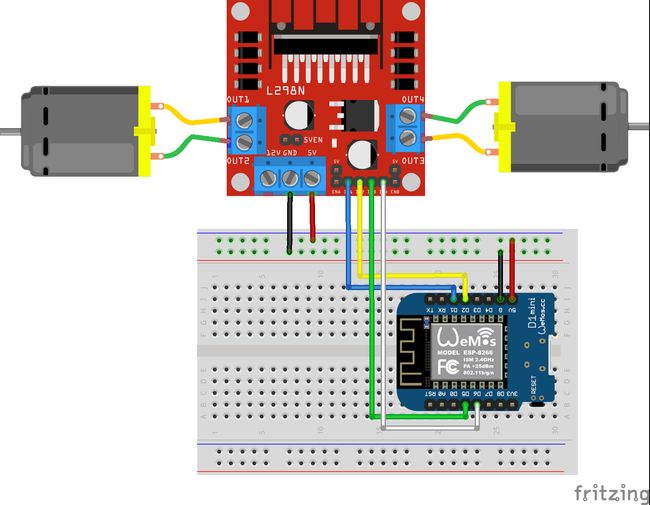
For the final assembly soldered the cables and some headers to a Wemos protoboard. The Wemos D1 Mini is mounted on top. For the motor controller I chose with an L298 dual motor board. No extra soldering is needed here.
The assembly of the motor part and the cylinder for winding the thread requires some trial and error. As for the construction, I chose wood. 3D printing a bracket would maybe be a better option, but I don’t have a 3D printer 😃
The most tricky part is the cylinder. It took me three tries to get the drilling to mount the motor into the cylinder correctly. The small micro gear motors do not produce much torque. Even the slightest tilt blocks the motor.
My final construction looks like this:
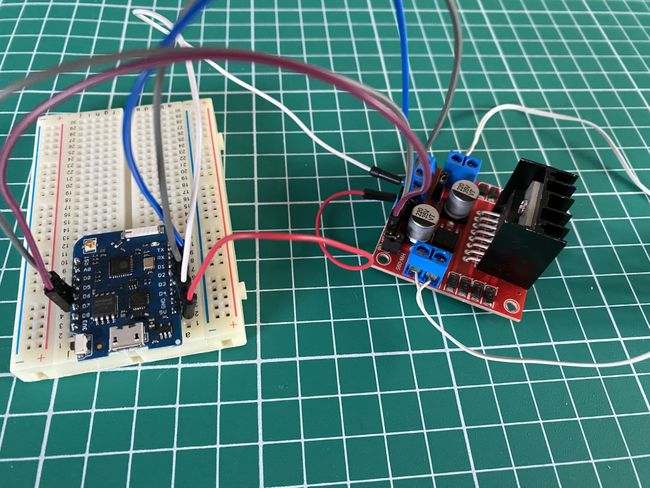
This got directly mounted to the ceiling.
Software
#This time I created the software using ESPHome. Controlling two motors is easy and can be done with a simple ESPHome sketch. No complex Arduino C development is needed.
ESPHome has support for the L298 motor controller via the fan integration. That’s why you will see fan commands in the code.
The forward and reverse pins for each motor are defined in the output block. These are connected to a (fan) motor by the fan block, which we can use later to control the motor direction and speed.
output:
 - platform: esp8266_pwm
   id: motor1_forward_pin
   pin: D2
 - platform: esp8266_pwm
   id: motor1_reverse_pin
   pin: D1
 - platform: esp8266_pwm
   id: motor2_forward_pin
   pin: D5
 - platform: esp8266_pwm
   id: motor2_reverse_pin
   pin: D6

fan:
 - platform: hbridge
   id: motor_1
   name: 'Motor 1'
   icon: 'mdi:spider-thread'
   pin_a: motor1_forward_pin
   pin_b: motor1_reverse_pin
   decay_mode: slow
   on_turn_on:
    - logger.log:
       format: 'Motor 1: on - duration = %d ms, direction = %d'
       args: ['id(motor_1_duration)', id(motor_1).direction]
   on_turn_off:
    - logger.log: 'Motor 1: off'

 - platform: hbridge
   id: motor_2
   name: 'Motor 2'
   icon: 'mdi:spider-thread'
   pin_a: motor2_forward_pin
   pin_b: motor2_reverse_pin
   decay_mode: slow
   on_turn_on:
    - logger.log:
       format: 'Motor 2: on - duration = %d ms, direction = %d'
       args: ['id(motor_2_duration)', id(motor_2).direction]
   on_turn_off:
    - logger.log: 'Motor 2: off'
In the program I defined two virtual switches to enable/disable the motor automation remotely for example via Home Assistant. The automation itself is an interval based script with some random variable to add some variance in the up & down movement.
interval:
 - interval: 1min
   then:
    - globals.set:
       id: motor_1_duration
       value: !lambda 'return (rand() % 8) * 1000 + 3000;'
    - if:
       condition:
        switch.is_on: program_1
       then:
        # forward
        - fan.turn_on:
           id: motor_1
           direction: forward
        - delay: !lambda 'return id(motor_1_duration);'
        - fan.turn_off: motor_1
        # pause
        - delay: !lambda 'return id(motor_1_duration);'
        # reverse
        - lambda: |-
           id(motor_1_duration) += 3000;
        - fan.turn_on:
           id: motor_1
           direction: reverse
        - delay: !lambda 'return (id(motor_1_duration));'
        - fan.turn_off: motor_1
Both motor automations follow the same pattern:
- Set the duration variable with a random number
- Turn motor on
- Wait for duration time
- Turn motor off
- Wait for duration time
- Turn motor on in reverse direction
- Wait for duration time
- Turn motor off
- Start with 1.
It even integrates with Home Assistant automatically with ESPHome. This is not really necessary as the motor control part runs automatically, but it is also fun to manually move the spiders up & down. It took some time to get the right values and ranges for motor_1_duration and motor_2_duration. They depend on the rotation speed of the motors, the weight of the spiders on the thread, and the height of the ceiling. Some trial and adjustment is needed.
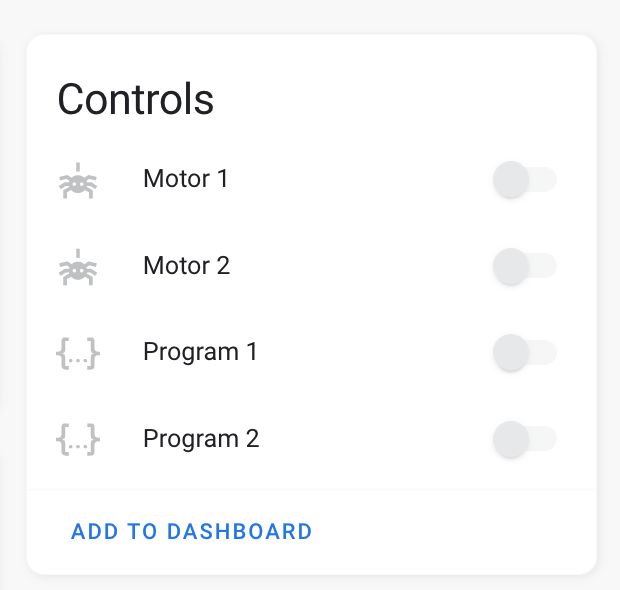
In Home Assistant I can turn on/off the automations using the virtual switches and control the motors directly. I can also set the motor speed and change the direction.
As usual the source can be found in my GitHub repository:
The final result
#The kids at the party had a lot of fun with the spiders. At first, they hadn’t seen them coming down from the ceiling and were absolutely scared. Next year, to level it up, I will try to get some spiders with blinking LED eyes.

