Weather Cards in Home Assistant: My Top Picks
Whether you want to see if you need an umbrella, trigger garden automation, or just want a nice weather forecast, it’s easy to integrate weather data into your Home Assistant. I don’t think I need to explain why having weather information on your Home Assistant dashboard is helpful. Almost every Home Assistant user has a weather card on the dashboard.
But there’s a bit more to it than just connecting a weather integration - you also need a suitable weather card. Many people have one on their home dashboard. It is one of the first cards you see when you open Home Assistant in your app or browser. So you want a nice, clean weather card that shows you all the information you need.
Over the past few weeks, I’ve been experimenting with different weather cards for my own dashboard. In this article, I’ll take you through the options I’ve tested, how to set them up, and the differences I’ve noticed in everyday use. By the end, you’ll know which approach works best for you - without having to install and remove five different cards yourself.
Why Upgrade From the Default?
#During my search for a better solution, I tested a handful of community cards that promise more features or a fancier look. Below are the four I’d recommend checking out, in order of increasing complexity and customization.
The setup
#You don’t need much to get started with a simple weather card. In fact, all you need is a configured weather integration. I use the default Open-Meteo integration which provides all the weather details and forecasts I need. Other weather data provides will of course work as well.
For more advanced uses, additional integrations such as UV data or a local temperature and pressure sensors will be helpful.
Almost all of the custom weather charts listed below offer powerful configuration options. In this article I can only summarise the highlights. A detailed list of all available options can be found in the linked GitHub repositories.
1. Official Home Assistant Weather Forecast Card
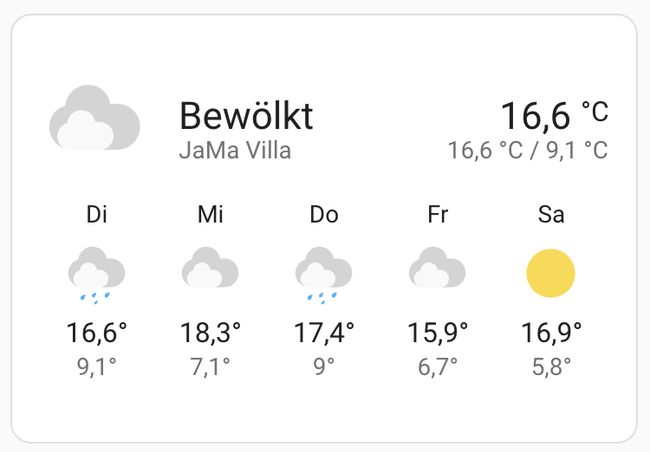
#Home Assistant includes a simple built-in weather forecast card. Adding it to your dashboard is quick and works with most integrations out-of-the-box.
This is the default option under Add Card > Weather Forecast in the dashboard editor. Setup is as simple as picking your weather entity.

It shows current conditions and a five-day forecast in a compact design that fits anywhere. You can switch between hourly and daily forecasts. You can select the number of forecast entries. You can choose an extra value to display below the main temperature - humidity, rainfall or wind. For many users, this may be enough.
Setup:
Just add it from the Lovelace UI. No YAML or HACS install needed.
When to use:
If you want something reliable and straightforward without any extra dependencies.
2. Clock Weather Card
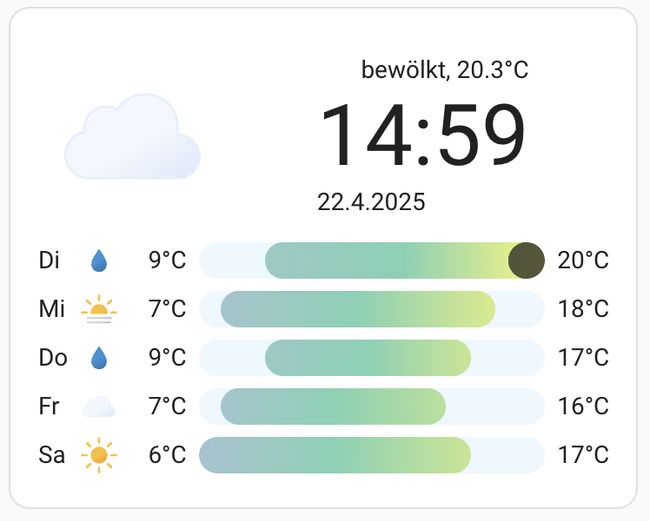
#While testing different weather cards, I also came across the Clock Weather Card. This option combines a digital or analogue clock with weather information, making it particularly useful for dashboards on wall tablets or displays where you want to see both the time and current conditions at a glance. Ideal for your home screen dashboard.

Installation:
Like most custom cards, the Clock Weather Card can be installed via HACS. Just search for “Clock Weather Card” in the HACS Frontend section and install it. After that, use the Lovelace UI to add it as a custom card.
Features:
You get a clear display of the current time alongside the weather icon, temperature and optional short forecast. The card is very powerful and already adds some complexity. There are several style options, including analogue and digital clocks, time zone and format, different animated icons, and you can customise which weather unit it uses. Various elements (current conditions, time & date, forecast) can be hidden for a very personal style. The number of forecast days is also configurable. The card also supports additional sensors for local temperature, humidity, apparent temperature and air quality. It also supports full localisation for a large list of languages.
With a wide range of compatibility with different Lovelace themes, making it easy to fit into your overall dashboard look.
Configuration:
The Clock Weater Card currently only supports YAML configuration. A UI configuration mode is not yet available.
My impression:
The card is perfect if you want a simple, nice to look at info panel that shows both the time and weather. I find it works best in the mobile app dashboard and on always-on displays in the kitchen or hallway, as guests instantly see both the weather and what time it is. It doesn’t have as many advanced options or data points as the Platinum Weather Card, but it handles the basics very elegantly.
3. Platinum Weather Card
#If you like to tweak every pixel or combine weather data from multiple integrations, Platinum Weather Card is the tool for you. This is your power horse for weather data. It’s designed as a flexible, fully GUI configurable weather card - no YAML needed if you don’t want to. Like the other cards before it shows the current weather conditions and the forecast. But it does not stop there, it can display various details such as
- sunrise and sunset
- wind conditions, speed and direction
- recorded rainfall
- visibility
- rain or snowfall forecast
- UV forecast
- fire danger
In the details section you can freely configure up to 16 attributes (2 columns of 8 each).
The forecast section of the cards supports two different layouts: horizontal and vertical. While the horizontal view displays icons and values in a row similar to the other cards, the vertical view is very verbose and gives you a detailed view of the coming days. This includes weather conditions, forecast temperature and rain, and a written weather forecast.
Installation:
Install via HACS under Frontend. Search for “Platinum Weather Card” and install. Then, add a new card of type Custom: Platinum Weather Card to your dashboard.
Configuration:
The card is fully configurable via the UI. It opens a full GUI editor with tons of settings. You can choose which data sources to use for each field, change the icon set, customise the forecast layout and much more.
To take advantage of the full feature set of this card, you will need multiple sensors. The default weather sensor may not be sufficient for this card. You will also need UV (such as from OpenUV or tomorrow.io) and fire danger forecast. Local temperature sensors can also be used.
My impression:
This Weather Card is perfect for anyone who wants to get and display all the data they can. The card allows extensive configuration and can be flexibly customised. However, this card is too much for a simple daily weather display that you look at on a tablet on the wall as you pass by. It is almost better suited for a seprated weather dashboard with a lot of details.
4. Simple Weather Card
#This is the opposite of the previous weather card. If you prefer a clean look and just the essentials, the Simple Weather Card is worth a try. This card is designed to minimise clutter while still providing the most important weather data. It’s great for smaller dashboards, side panels or mobile views where space is at a premium.

Installation:
Same like before, you’ll find the Simple Weather Card in HACS under Frontend. After installing, just add it as a custom card through the Lovelace dashboard editor.
Features:
The minimalist layout of this weather card is straightforward - current weather icon and temperature, with options for additional details such as humidity, wind or precipitation. You can also customise which attributes are shown if you want to keep things extra minimal.
The card has a nice day and night view and you can customise the background color of the card.
It works with standard weather entities, so it’s compatible with the usual Home Assistant weather integrations. A local temperature sensor is also supported.
Configuration:
The Simple Weater Card currently only supports YAML configuration.
My impression:
I use the Simple Weather Card on my phone dashboard because it loads quickly and doesn’t overwhelm the screen. It’s also a good choice for secondary dashboard panels where I don’t need a detailed forecast, just a quick overview. If you have family members who get confused by too much detail, this card keeps things simple and usable.
Other options:
#• Hourly Weather Card: A simple card to visualise upcoming weather conditions as a coloured horizontal bar. This card focuses on one thing and does it perfectly.
• Weather Chart Card: If you prefer graphical trends, this card visualises forecast data such as temperature and precipitation over time. Similar to the Platinum Weather card this card, with all the details, deserves more space on the dashbaord.
Which Card to Choose?
#If you’re happy with a basic weather summary:
Stick with the built-in card. It’s low-maintenance, fast, and works everywhere.
For a visually appealing dashboard, especially on a wall tablet:
Try the Clock Weather Card, he animations are subtle but make a big difference. Or, if you prefer a more minimalist design, choose the Simple Weather Card.
If you want maximum control and like to experiment:
Platinum Weather Card is the most powerful option, letting you mix and match data sources and customize the look.
My Setup
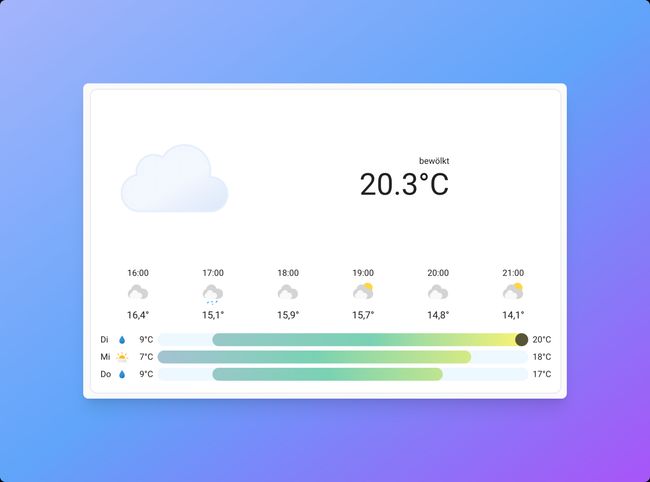
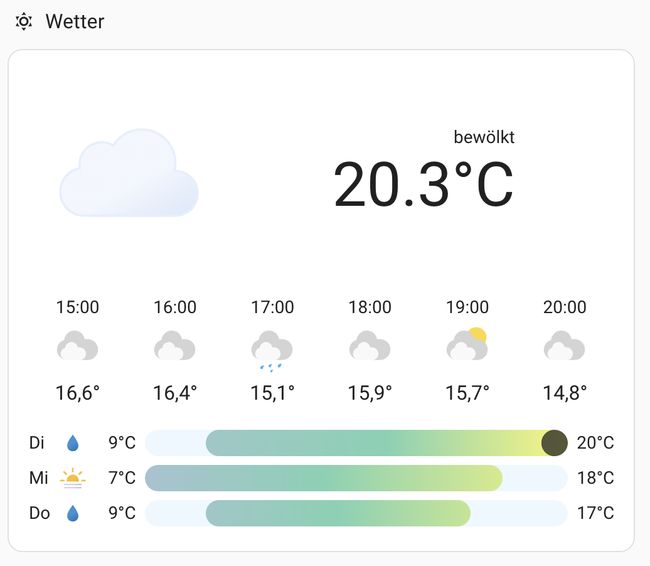
#At the moment I use the Clock Weather card in my main dashboard in combination with the forecast from the then standard built-in weather card. Using the custom `vertical-stack-in-card’ card, these can be nicely stitched together to give them a “one card” look and feel. Here is the YAML of the combination:
type: custom:vertical-stack-in-card
cards:
 - type: custom:clock-weather-card
   entity: weather.jama_villa
   temperature_sensor: sensor.garden_temperature
   locale: de
   weather_icon_type: fill
   hide_clock: true
   hide_date: true
   forecast_rows: 3
   show_decimal: true
   hide_forecast_section: true
 - show_current: false
   show_forecast: true
   type: weather-forecast
   entity: weather.jama_villa
   forecast_type: hourly
   forecast_slots: 6
 - type: custom:clock-weather-card
   entity: weather.jama_villa
   temperature_sensor: sensor.garden_temperature
   locale: de
   weather_icon_type: fill
   hide_clock: true
   hide_date: true
   forecast_rows: 3
   show_decimal: true
   hide_today_section: true
Conclusion
#There’s no one-size-fits-all answer. Home Assistant’s default forecast card covers the basics well, but the community has provided excellent alternatives for anyone wanting more features or a nicer look.
If you haven’t tried a new card in a while, I recommend experimenting—weather is one of those bits of information you glance at every day, so it’s worth making it just right.
Happy automating!
