Smart EV Charging: Automatic Home Charger Control with AI License Plate Recognition
Are you familiar with the following situation?
You’ve just returned from shopping or work and the battery in your electric car is running low, so you need to charge it. You just need to plug the charging cable into the EV charger and switch charging on. But at the same time, you’ve still got groceries and other stuff in the trunk, and your hands are full. Ever found yourself fumbling for the RFID chip or card or opening the charger app just to start charging your electric vehicle?
We are actually regularly in exactly this situation. Our EV charger is openly accessible from the street. That’s why we have a model that can be locked so that nobody can charge their car without authorisation. Unlocking them isn’t usually a big deal, but sometimes it is when you have your hands full, have to carry something, etc.
What if your smart home could automatically recognize your car and start charging without any manual intervention? Today I’ll show you how I built an intelligent EV charging automation that uses camera motion detection and AI-powered license plate recognition to automatically unlock and start charging when our Polestar arrives home.
This leads us to two challenges:
Securing an EV Charger in an Open Carport
#As our carport faces the street, our EV charger is visible and accessible to anyone walking by. Without proper access control, neighbours or strangers could easily plug in their vehicles and charge at our expense. Of course, we have cameras, but they won’t stop everyone. This is particularly problematic if we’re away from home for a while.

Fortunately, most modern smart home chargers address this issue by offering built-in authorisation options, often via RFID or an app. However, having to unlock them manually every time becomes tedious. This is where automation comes in, intelligently recognising authorised vehicles and automatically managing access control.
Detecting the car
#The second challenge is recognising the vehicle and, above all, the right vehicle. We only want to activate the charger when our own vehicle is parked and not a other random vehicle.
You can try to recognise the car with the help of distance or motion sensors. At least whether an object, i.e. a vehicle, is in the carport or garage. But how do you know which vehicle it is?
There are a number of vehicle integrations in Home Assistant. There should be a way for almost every vehicle manufacturer to make the vehicle data visible in Home Assistant. Some of them, such as the BMW, Tesla or Mercedes integrations, can also provide GPS and location data. This is definitely a good way to recognise whether your own vehicle is in the carport.
As the Polestar integration can only provide very little vehicle data, I had to fall back on another option.
I used the cameras to recognise our car. The vehicle and the number plate are recognised via a snapshot which is analysed by AI. The automatic charging process is only started if the correct licence plate number is recognised.
Compatible EV Charger Requirements
#This automation works with any smart EV home chargeer that supports authentication control and Home Assistant integration. Whether you have a KEBA - like our Keba P30, Wallbox, Ohme, Easee, Myenergi, go-e Charger, OpenWB, or other compatible charging station, the core principles remain the same.
If the charging station is installed in a garage or locked area, this is of course the easiest way. Since our carport is open and accessible to anyone passing by, we need a charger which can be locked and is only useable after authorization.
For this automation to work with your setup, your EV charger must integrated with Home Assistant and needs to meet these essential requirements:
- Lock entity: For controlling authentication/access (
lock.wallbox_authentication) - Binary sensors: For plug state and charging state monitoring
- Reliable connectivity: Either local network or cloud-based control
Our Hardware Setup
#The core setup consists of three components.
The EV charger
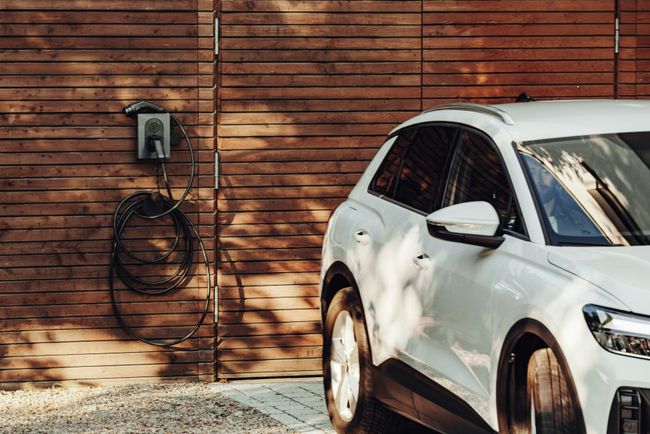
#The heart of our setup is the KEBA P30 wallbox, which has excellent integration into Home Assistant. The KEBA integration provides binary sensors for charging state, plug state, energy counters, and crucially, a lock entity for authentication control and start/stop of the actually charging session.
Camera System
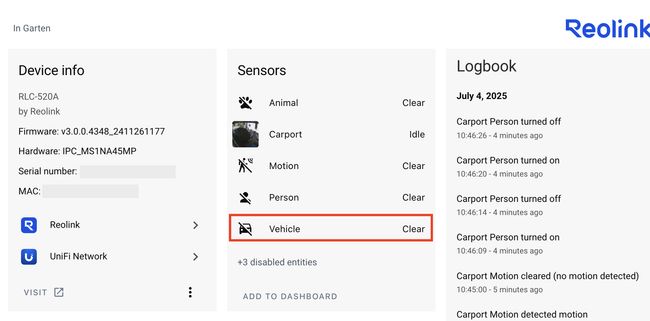
#I’m using Reolink cameras and one of them is positioned in our carport to detect when a vehicle arrives. Our front door camera can also see the driveway. The cameras support generic motion detection, as well as person and vehicle detection, and snapshot functionality, all of which are accessible through Home Assistant. The vehicle detection binary sensors serve as our automation triggers.
AI Integration for License Plate Detection
#As the camera itself can recognise vehicles as well as people or animals, we use it to take a snapshot photo. We now need image recognition to analyse the photo and recognise the number plate. For this we use an AI integration from Home Assistant.
I use the Google Generative AI for license plate recognition from camera snapshots. This eliminates the need for complex local computer vision setups while providing reliable plate detection and vehicle identification. Other AI integration such as OpenAI or Anthropic Conversation should also work here. If you don’t want to send your photos to the cloud, you can also use a local LLM (Large Language Model) via Ollama with a little more effort and computing power.
For more information about Home Assistant and AI integration topics see this blog post.
Setting Up the Prerequisites
#Before implementing this automation, ensure you have these integrations configured:
EV Charger Integration
#The configuration varies depending on the brand of EV charger:
For a KEBA charger, such as the one we have, the configuration is pretty simple. You only need to provide the charger’s hostname or IP address in your network and the RFID tag key used for authorisation.
For other common brands, this will be slightly different. Commonly used chargers (according to Google) are:
- Wallbox brand chargers: use the built-in Home Assistant integration
- go-e Charger: install the community integration via HACS
- Tesla Wall Connector: use the built-in Home Assistant integration
- ChargePoint: install the community integration via HACS
- Zaptec: install the community integration via HACS
- OpenWB: set up MQTT integration and configure the OpenWB MQTT topics
Camera Integration
#Make sure your cameras are properly integrated into Home Assistant, that they expose motion detection binary sensors, and that they can take snapshot photos. While I recommend Reolink cameras, a wide range of other brands can be integrated with Home Assistant.

Ideally, the camera will already have built-in object and person detection, which is also exposed to Home Assistant. This can be used instead of generic motion detection. This means that the automation will only be triggered when a vehicle is detected, rather than with every movement. If only a cat crosses the path and no vehicle is detected, the automation does not need to be started. If this is not available as a binary sensor, a generic motion sensor will suffice. However, this often leads to images being sent to the AI for analysis even when there are no cars.
Google Generative AI Integration
#Set up the AI integration for image analysis capabilities. In case of Google Generative AI you’ll need an API key from Google AI Studio. For others the setup process is mostly similar.
Lets make it Smart
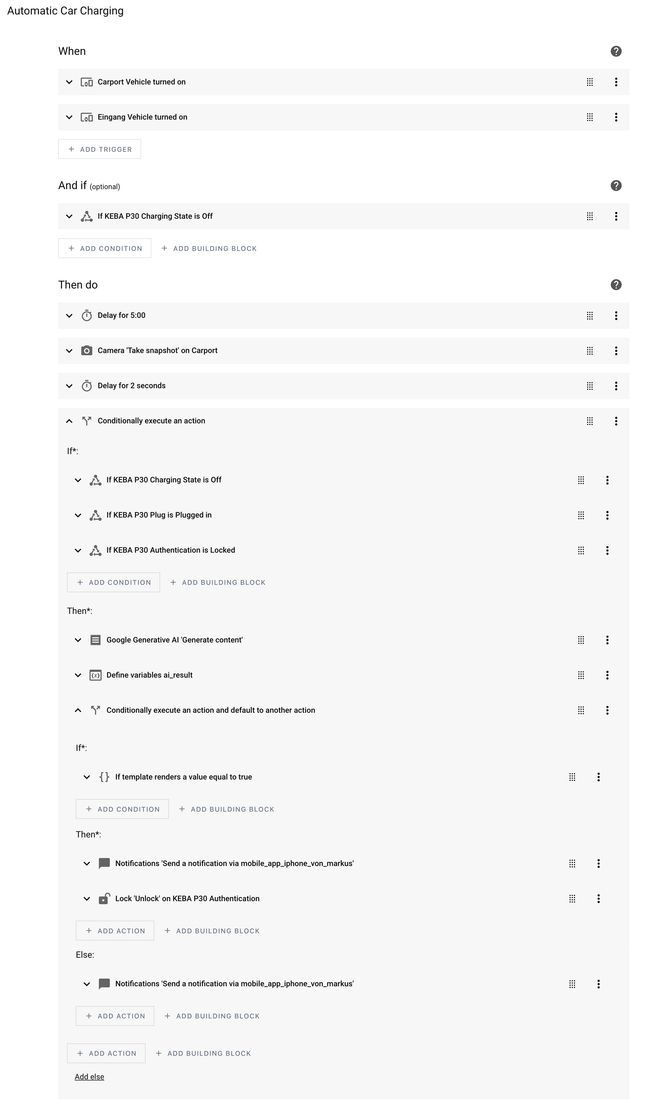
#The automation follows a sophisticated workflow that balances security with convenience:

- Motion Detection: Camera sensors detect movement in the carport area via two different cameras
- Condition Checks: Verify if the is already charging?
- Patience Delay: 5-minute wait to allow parking and cable connection
- Condition Checks: Verify the car is plugged in, the EV charger is locked, and not already charging
- AI Analysis: Capture and analyze a snapshot to identify the license plate
- Smart Decision: Unlock and start charging for authorized vehicles, or send alerts for unknown cars
The Complete Automation
#This is how my automation looks like with the KEBA P30 charger and the Reolink cameras:

Here is the YAML version so that you can better adopt and customise it:
alias: Automatic Car Charging
triggers:
  - type: turned_on
    device_id: a8715.....................6f44e2
    entity_id: 41585.....................7f54bc
    domain: binary_sensor
    trigger: device
  - type: turned_on
    device_id: 3d634.....................76e7e4
    entity_id: e2dc6.....................5ede79
    domain: binary_sensor
    trigger: device
conditions:
  - condition: state
    entity_id: binary_sensor.keba_p30_charging_state
    state: "off"
actions:
  - delay:
      hours: 0
      minutes: 5
      seconds: 0
      milliseconds: 0
  - if:
      - condition: state
        entity_id: binary_sensor.keba_p30_charging_state
        state: "off"
      - condition: state
        entity_id: binary_sensor.keba_p30_plug
        state: "on"
      - condition: state
        entity_id: lock.keba_p30_authentication
        state: locked
    then:
      - action: ai_task.generate_data
        metadata: {}
        data:
          task_name: Analyse Parked Car
          instructions: >-
            Detect if a car enters the carport. Capture the license plate of the
            car and the car color.


            The camara taking the picture is place inside the carport below the
            roof. Only focus on cars directly inside the carport itself. The car
            must clearly entering the drive-in or be already inside the carport.


            Ignore:

            * Ignore cars just driving by.

            * Ignore cars on the other side of the street

            * Ignore cars in the neighbours garage or carport which is located
            on the opposite side of the street

            * Ignore the car directly next to the yellow house on the other side
            of the street.

            * Ignore cars in the background
          attachments:
            media_content_id: media-source://camera/camera.carport_fluent
            media_content_type: application/vnd.apple.mpegurl
            metadata:
              title: Carport
              thumbnail: /api/camera_proxy/camera.carport_fluent
              media_class: video
              children_media_class: null
              navigateIds:
                - {}
                - media_content_type: app
                  media_content_id: media-source://camera
          entity_id: ai_task.google_ai_task
          structure:
            license_plate:
              description: The license plate of the car
              required: true
              selector:
                text: null
            color:
              description: The color of the car
              selector:
                text: null
        response_variable: ai
      - if:
          - condition: template
            value_template: >-
              false
        then:
          - action: notify.mobile_app_iphone_von_markus
            metadata: {}
            data:
              title: JaMa Villa - 🚗
              message: >-
                Car is in garage, start charging automatically.
          - action: lock.unlock
            metadata: {}
            data: {}
            target:
              entity_id: lock.keba_p30_authentication
        else:
          - action: notify.mobile_app_iphone_von_markus
            metadata: {}
            data:
              message: >-
                A car was detected, but not sure this is ours. Better check.
              title: JaMa Villa - 🚗
mode: single
Make it your own
#Even if it is not a blueprint, the automation can be adapted relatively easily. The following changes are necessary for this:
- Device and Entity IDs
Replace all device IDs and entity IDs with those from your specific setup. Use Developer Tools → States to find the correct entities for your cameras and charger. - Licence plate check:
Assuming your licence plate is different to ours 😃, you need to change the check in line XX as well. - Unlock the charger:
Depending on how Home Assistant integrates with the EV charger, this might involve unlocking a lock, as in our case, or sending a command via MQTT or triggering a service to authorise and start charging. - Notification:
Replace the notification service and adapt the messages as required.
Licence plate recognition may require 2-3 attempts and some trial and error. AI recognition was not 100% accurate in our case, so I configured three options. False positive detection might be possible. If the Home Assistant integration for your vehicle provides location data, I would also use this for an additional check and incorporate it into the automation.
Conclusion and Future Enhancements
#The current automation works very well for us. I’m very happy with it as it makes starting the charging process really easy!
However, as a Home Assistant Pro, you’re always thinking about how you can optimise things even further 😉. I also have the following ideas:
- Multiple Vehicle Support: this is not an issue for us as we only have one car, but it certainly is for others.
- Smart surplus charging via the PV system, which will definitely be an option for us.
- Integrate with Home Assistant presence detection to disable the automation when residents are away, adding an extra security layer.
This smart EV charging automation is a really versatile solution. It’s got camera motion detection, AI image analysis and a connected EV charger, all controlled by Home Assistant. This means it’s really convenient and secure, as it automatically starts charging the cars you know about while blocking others. The logic works with various EV charger brands and camera setups, just needing a few minor tweaks for your specific hardware.
We’ve successfully used this automation with our KEBA P30 and Polestar over the last two weeks. Its key strength lies in Home Assistant’s ability to integrate diverse technologies – from simple sensors to advanced AI – into a practical automation that genuinely enhances daily life, regardless of your chosen EV charger.
Happy automating, and enjoy the convenience of never having to fumble for charging authentication again – no matter which EV charger or car you choose!
Image sources:
- Hero: Michael Marais
- Charger with car: Zaptec
